I recently splurged on a vanity domain that I realized I didn’t have time or interest in developing into a full-blown blog or microsite. Because of this I decided it would just be best to redirect it to this blog.
The problem is that I’m too cheap and lazy to pay for and manage a small server running Apache or Nginx. This can be a perfectly good option, but the last thing I want is to waste time on server management/config just to forward a vanity domain.
Instead of paying for a dedicated server for this task I opted to use AWS S3 and Route 53 to forward my domain for me. These cost me a fraction of the price of the smallest rentable EC2 instance. It also means that after I get it setup I never have to deal with the pains of configuration or server management.
Here’s how you can setup your own vanity or typo domain forwarding without paying for a web server.
Outline:
- Register your domain
- Create an AWS Hosted Zone
- Create S3 buckets to act as forwarding buckets
- Configure AWS Hosted Zone
- Debug everything in-between
Registering Your Domain
The first step is to register your domain. While I suggest just bundling everything together and using AWS Route 53 as your domain registrar too, sometimes you’ll need to use an alternate registrar. This usually happens if you want a top level domain that AWS doesn’t offer (such as .ly). We’ll cover what to do if you can’t register directly via AWS below but for now I’ll assume you haven’t yet registered a domain.
To register your domain through AWS you’ll sign into your AWS account and find the Route 53 service.
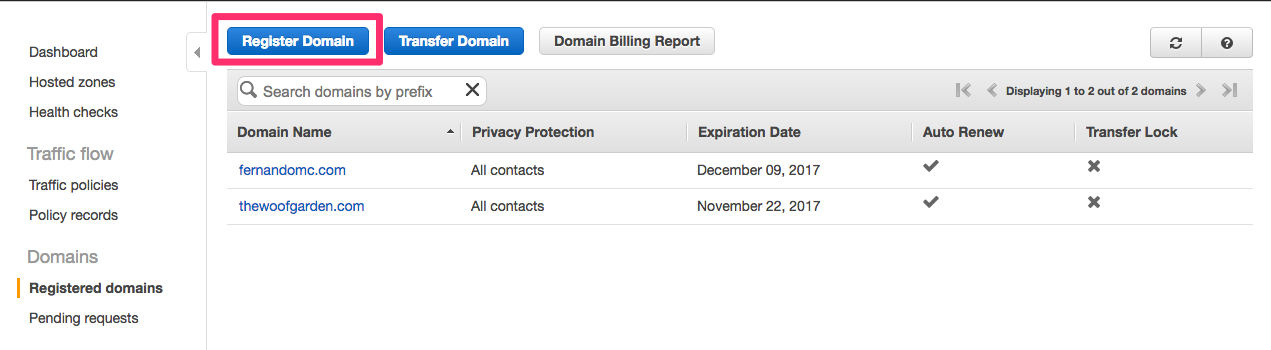
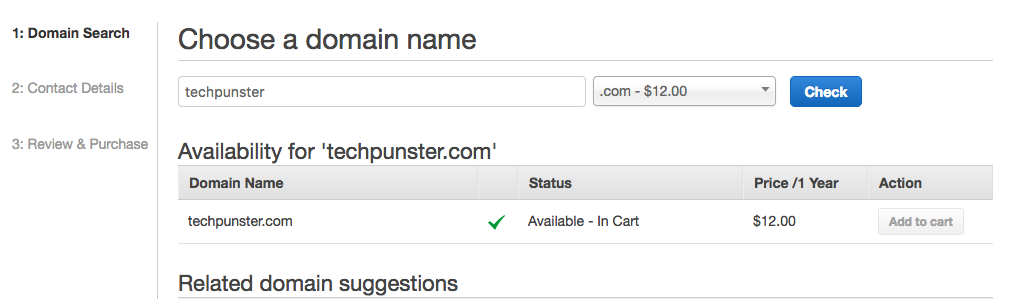
In that console you will click the section for “Registered domains” and then proceed with the steps after clicking “Register Domain”. The hardest part here will be choosing what vanity URLs to forward:
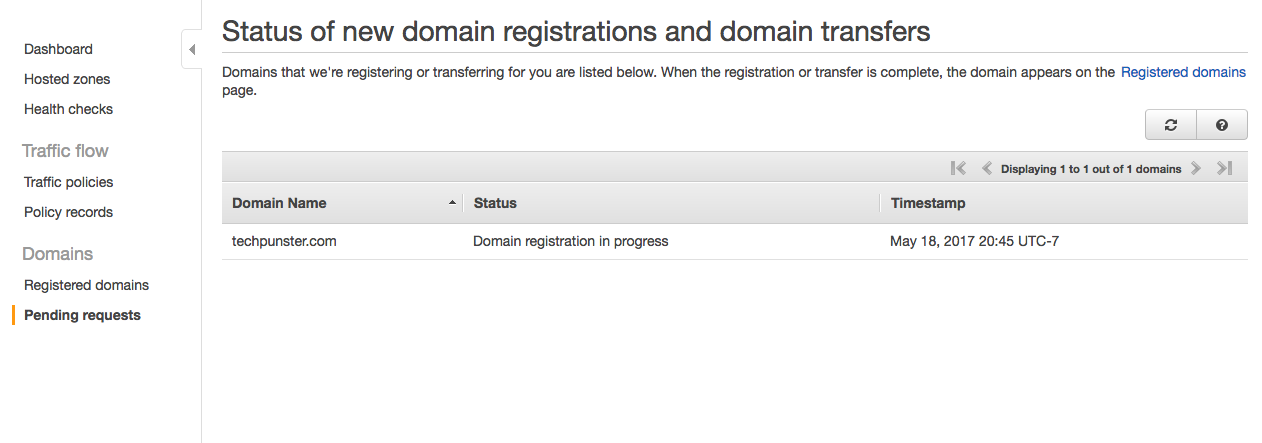
If you run into any issues with the registration process on AWS, this guide should help you finish up. After you register the domain you’ll get an email from AWS letting you know it was successful. In the meantime you’ll see this under pending requests:
While you’re waiting for the email confirmation you can move on to the next step.
Creating an AWS Hosted Zone
The AWS domain registration process will automatically create a Hosted Zone for you in the Route 53 section of the console under the “Hosted Zone” section.
If you registered your domain somewhere else, create a Hosted Zone in Route 53. Make sure this Hosted Zone is a “Public Hosted Zone” and matches your naked domain name e.g. techpunster.com without the www.
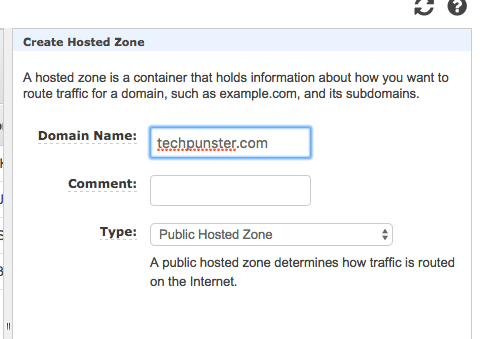
Regardless of which way the Hosted Zone was created, you should see an initial SOA and NS entry in your Hosted Zone after creation. Once you see that you can move to the next step.
Create S3 Buckets
Next, we’ll need to create the S3 buckets we’ll be using to forward traffic from our newly-created domain to the location we’d like our users to end up.
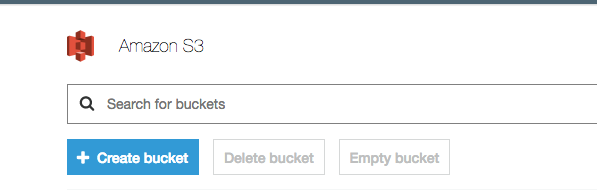
In order for this process to work we need to create S3 buckets that exactly match our domain name and our optional www subdomain. You’ll need to create the buckets from the AWS S3 console:
I’ve created the buckets techpunster.com and www.techpunster.com to match the domain I registered via AWS. After you create your two buckets you’ll need to set them up as forwarding buckets. To do this select your bucket from the S3 console list of buckets and click ‘Properties’.
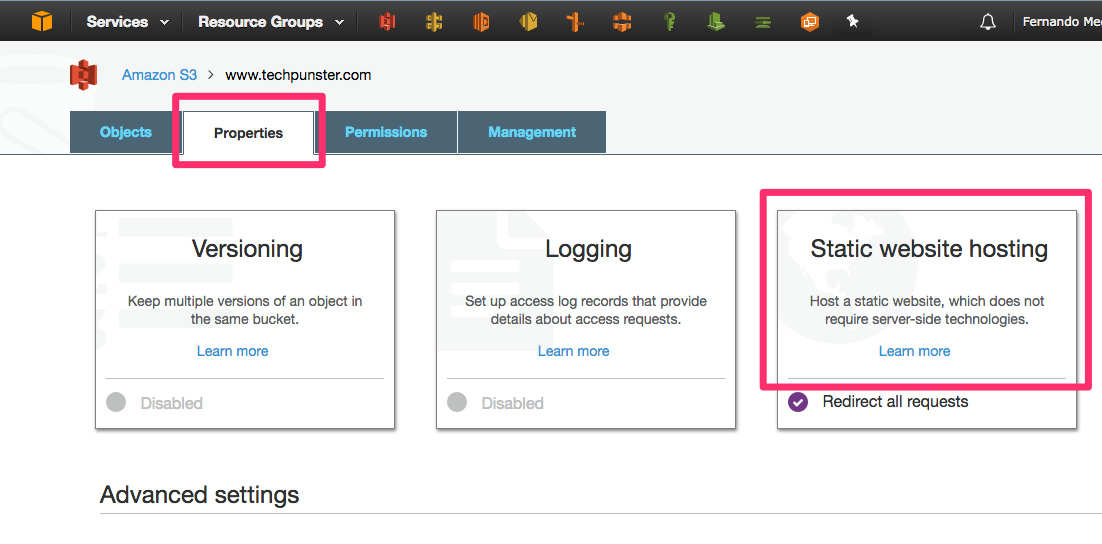
There should be a ‘Static website hosting’ option. Click that and select ‘Redirect Requests’.
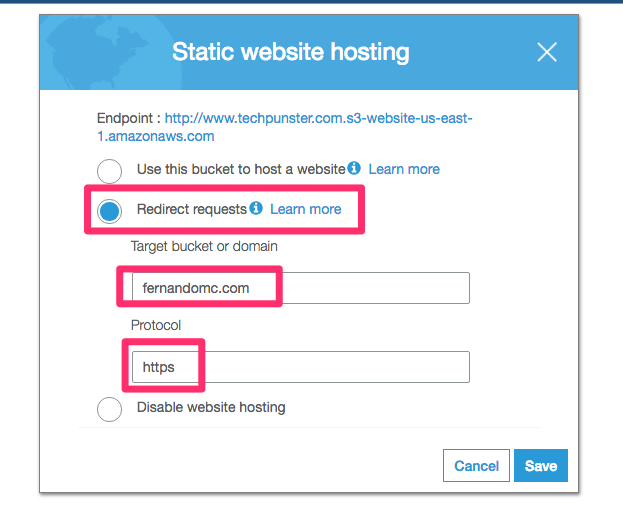
You’ll need to set the domain to forward to and the protocol to forward on. In the above case I was forwarding to this site and sending traffic to https. Enter “https” if the destination site has it otherwise enter “http”.
Once both your www and non-www buckets are setup you can test that they’re redirecting properly by opening up the window in the above screenshot again and clicking on the S3 urls themselves to make sure they forward to your site as expected.
For example, my S3 urls for techpunster.com and www.techpunster.com look like these respectively:
http://techpunster.com.s3-website-us-east-1.amazonaws.comhttp://www.techpunster.com.s3-website-us-east-1.amazonaws.com
To test if you’ve completed this step correctly visit both of your S3 static site urls to see if they are properly forwarding to your destination domain. As soon as they are, we can move on to the next step.
Configure Your Hosted Zone
As I mentioned before if you open up your Hosted Zone you should see two entries. One will be an SOA entry and the other an NS entry.
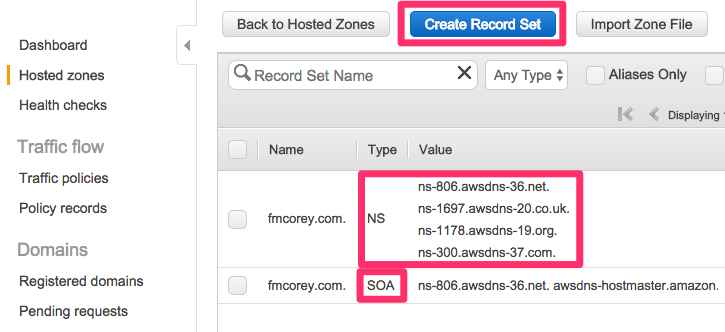
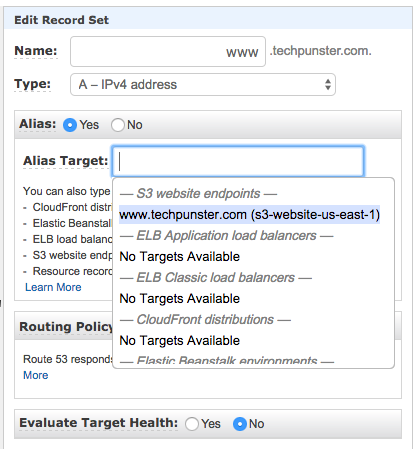
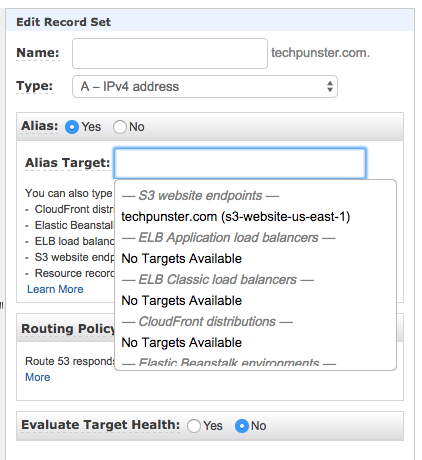
With those entries already in place you’ll need to create two A records in order to alias the domain names to your S3 buckets. To do this click the “Create Record Set” button while within the hosted zone.
One of the aliases will be to catch traffic going to the www domain:
The other will catch traffic to the non-www domain:
If you registered your domain name through AWS you shouldn’t have to do anything else! Within a few minutes you should see the domain you registered forwarding to the domain you selected during the S3 bucket creation and configuration step.
If you registered your domain elsewhere there’s one more step you’ll need to finish…
Configuring Name Servers
Assuming you’re using an alternate domain registrar, you can configure DNS settings on your registrar to point to AWS’s DNS.
To do this check the NS entry of your hosted zone (shown above under Configure Your Hosted Zone) and look at the DNS nameserver values that AWS provides. You should see four values that look something like this:
ns-184.awsdns-23.com.
ns-1767.awsdns-28.co.uk.
ns-976.awsdns-58.net.
ns-1194.awsdns-21.org.
Copy down each of these values and open up the account where you registered the domain you’d like to forward from. Do not mess with the DNS of the website you are forwarding to, you’re changing the DNS on the domain you’re forwarding from.
In your registrar’s account you should be able to find a section of the dashboard called “DNS” or “Manage Nameservers” or something similar that allows you to enter in DNS records. This should be similar to what we did earlier with the A records in AWS. If you can’t find it, reach out to your provider and ask them how to change the Nameservers for your domain.
Once you find that section, you’ll change whatever nameservers are currently setup to the AWS Nameservers you copied down from above. After you save these changes you’ll have to wait for the DNS record changes to propagate, but you should start to see your domain forward as expected!
Debugging DNS
All kinds of issues can come up when dealing with DNS changes. So here’s a few quick examples of potential pitfalls and how to deal with them.
- Make sure your domain registrar has only one place to set nameservers
When I registered serverless.ly I used http://register.ly/. This in itself was not ideal because:
- I had to use something outside of AWS infrastructure
- The registrar itself had internal issues and threw 500 errors when I tried to change my DNS
- I later found out they had two separate places to set nameservers. One was in the DNS entries NS/A/CNAME Etc. and the other was a specialized page for setting nameservers
- I eventually sent a support request out and they told me how to change the settings I needed
The point of this story is: if you can’t figure out how to change nameservers, ask your registrar/host!
- Use some common utilities to test your DNS changes
If you’re not sure if you’re DNS settings are taking on your forwarding domain try using dig +trace domain.com and replacing domain.com with the domain you’re forwarding from. That should check what DNS are currently configured for the domain and can be useful for tracking down what some of the issues are. Similarly, if you need to test availability or routing, ping and traceroute can also be helpful.
- Make sure you can create the S3 bucket you need
Technically, to forward the domain in this way you need to have an S3 bucket that matches your forwarding domain exactly. While you might be able to get around this by using CloudFront, it isn’t recommended and would be much more difficult.
If you’re having any issues getting setup feel free to leave a comment below or reach out to me on Twitter.