
Yesterday, I wrote a post on creating a Cognito Authorizer for an AWS HTTP API. But I didn’t do much with the Lambda functions themselves! In this post, I’ll expand the previous post and show you how to get an entire user profile service up and running with the same architecture using Python or Node.js. Let’s get started!
Prerequisites
I’ll expect you to have all the following:
- You’ll need to get the new code from GitHub here
- You’ll also need the AWS CLI installed and configured
- Then you’ll need to install the Serverless Framework
- For this demo, I’ll be using Node.js and Python 3
The Code!
Inside the repository, you should see these files:
.
├── README.md
├── profile.js
├── profile.py
└── serverless.yml
Let’s look at each of these (except than the README.md file, which is just a quick explanation of the project for folks on GitHub).
serverless.yml
Inside of the serverless.yml file we’ll setup most of the configuration for our service. To start, we give our service a name:
service: http-api
Then, we have a provider section that tells the Serverless Framework to deploy to AWS with the runtime of python3.8. If you’d prefer to use Node.js you can do that by changing the runtime value to nodejs12.x. Because I’ve included both a Python and Node.js version of the code named in the same way either method will deploy the service correctly.
provider:
  name: aws
  runtime: python3.8 # OR: nodejs12.x
Next, we have an environment section to define some environment variables. This will allow us to use them later in this file as a reference and later on in the code for our service. Specifically, we create ann environment variable of DOMAIN_SUFFIX for our Amazon Cognito resources and a DYNAMODB_TABLE environment variable to name our table. Both of these will change based on the stage they are deployed to.
Importantly, you will need to change the custom-domain portion of the DOMAIN_SUFFIX below in your code in order to make sure you don’t use a name someone else has already used!
  environment:
    # Change the "custom-domain" on the next line to something else
    DOMAIN_SUFFIX: custom-domain-${self:service}-${opt:stage, self:provider.stage}
    DYNAMODB_TABLE: ${self:service}-${opt:stage, self:provider.stage}
Now we setup permissions for our service. In this case we setup a bunch of DynamoDB permissions to allow our service to send and retrieve data to and from DynamoDB.
  iamRoleStatements:
    - Effect: Allow
      Action:
        - dynamodb:GetItem
        - dynamodb:PutItem
        - dynamodb:Query
        - dynamodb:UpdateItem
      Resource: "arn:aws:dynamodb:${opt:region, self:provider.region}:*:table/${self:provider.environment.DYNAMODB_TABLE}"
You’ll notice in the last line of this section we refer to the DYNAMODB_TABLE portion of the environment variables section to make sure that we’re granting permissions only on our table.
Next, there is a section to configure the AWS HTTP API with an Amazon Cognito authorizer:
  httpApi:
    authorizers:
      serviceAuthorizer:
        identitySource: $request.header.Authorization
        issuerUrl:
          Fn::Join:
          - ''
          - - 'https://cognito-idp.'
            - '${opt:region, self:provider.region}'
            - '.amazonaws.com/'
            - Ref: serviceUserPool
        audience:
          - Ref: serviceUserPoolClient
I wont go into much detail on this as I talk about it and the Amazon Cognito resources it references more in my previous post. But just know this configures our HTTP API with the Cognito User Pool and other resources we’re creating so that it can serve as the authorizer for our API.
The next section is the functions section which defines the Lambda functions we’ll be using in this service. We have two functions, one to get a user’s profile information and another to create/update the user’s profile. This points to either the profile.py or profile.js files that I’ve included (depending on which runtime you configured earlier in this file).
functions:
  getProfileInfo:
    handler: profile.get
    events:
      - httpApi:
            method: GET
            path: /user/profile
            authorizer: serviceAuthorizer
  createProfileInfo:
    handler: profile.create
    events:
      - httpApi:
            method: POST
            path: /user/profile
            authorizer: serviceAuthorizer
You’ll notice both of these httpApi events have the authorizer section included. This means that they will always make sure to run a verification check against the user sending in the details to see if they are using a verified JSON Web Token. This allows us to make sure users have signed in with Cognito before they have access to our application APIs to get or update their profile information.
Next, we have the resources section where we create the Cognito User Pool and our DynamoDB table. Here’s the DynamoDB table:
resources:
  Resources:
    profileTable:
      Type: AWS::DynamoDB::Table
      Properties:
        TableName: ${self:provider.environment.DYNAMODB_TABLE}
        AttributeDefinitions:
          - AttributeName: pk
            AttributeType: S
          - AttributeName: sk
            AttributeType: S
        KeySchema:
          - AttributeName: pk
            KeyType: HASH
          - AttributeName: sk
            KeyType: RANGE
        ProvisionedThroughput:
          ReadCapacityUnits: 1
          WriteCapacityUnits: 1
        GlobalSecondaryIndexes:
        - IndexName: sk-pk-index
          KeySchema:
          - AttributeName: sk
            KeyType: HASH
          - AttributeName: pk
            KeyType: RANGE
          Projection:
            ProjectionType: ALL
          ProvisionedThroughput:
            ReadCapacityUnits: 1
            WriteCapacityUnits: 1
      # Other Amazon Cognito resources
While it looks complicated, this is a pretty standard DynamoDB table design that has a partition key of pk and sort key of sk. It also has an inverted index that flips the two. It’s a bit more complicated than you might need right now, but in the long run if you base a real application around this it will give you a lot more query patterns right out of the box.
The final part of the serverless.yml file is the Amazon Cognito resources we’re creating. I describe how the Cognito User Pool is created in my previous post so take a look at that if you have any questions. Here’s what it looks like:
    HttpApi:
      DependsOn: serviceUserPool
    serviceUserPool:
      Type: AWS::Cognito::UserPool
      Properties:
        UserPoolName: service-user-pool-${opt:stage, self:provider.stage}
        UsernameAttributes:
          - email
        AutoVerifiedAttributes:
          - email
    serviceUserPoolClient:
      Type: AWS::Cognito::UserPoolClient
      Properties:
        ClientName: service-user-pool-client-${opt:stage, self:provider.stage}
        AllowedOAuthFlows:
          - implicit
        AllowedOAuthFlowsUserPoolClient: true
        AllowedOAuthScopes:
          - phone
          - email
          - openid
          - profile
          - aws.cognito.signin.user.admin
        UserPoolId:
          Ref: serviceUserPool
        CallbackURLs:
          - https://localhost:3000
        ExplicitAuthFlows:
          - ALLOW_USER_SRP_AUTH
          - ALLOW_REFRESH_TOKEN_AUTH
        GenerateSecret: false
        SupportedIdentityProviders:
          - COGNITO
    serviceUserPoolDomain:
      Type: AWS::Cognito::UserPoolDomain
      Properties:
        UserPoolId:
          Ref: serviceUserPool
        Domain: service-user-pool-domain-${opt:stage, self:provider.stage}-${self:provider.environment.DOMAIN_SUFFIX}
The Handler File - profile.py
Now that we’ve seen all the infrastructure we’re going to deploy, let’s look at the code that will run when we make a request to the API. I’ll be looking at the profile.py file. But the Node.js version inside profile.js does almost exactly the same thing and is structured the same way.
First, we import our dependencies and setup our DynamoDB table resource using boto3 and the DYNAMODB_TABLE environment variable that we created in the environment section of serverless.yml.
import boto3
import os
import json

dynamodb = boto3.resource('dynamodb')

TABLE_NAME = os.environ['DYNAMODB_TABLE']
table = dynamodb.Table(TABLE_NAME)
From here, we have our first function create(). This is used to create the user profile information that we’re going to store in DynamoDB. It processes an incoming JSON object and stores it in DynamoDB.
First, it processes the incoming event object and gets the sub value from the details of the authorizer that was used for this request. This sub value is a unique identifier for our users that will be present with every authenticated request. It will always come in because we’ve set up our HTTP API with the Cognito User Pool in our serverless.yml file. If a request tries to come in without a valid JSON Web token as an authorization token the request wont even make it to our function!
def create(event, context):
    print(event)
    user_sub = event['requestContext']['authorizer']['claims']['sub']
    # ...
Next, we process the body of the incoming request and load the JSON object sent in as a Python dictionary that we store in profile_data. From there, we create the DynamoDB item that will be stored inside the table using the user_sub variable we created with the unique user’s sub value.
    profile_data = json.loads(event['body'])
    item = {
        'pk': 'USERS#ALL',
        'sk': 'USER#' + user_sub,
        'profile_data': profile_data
    }
Next, we actually send the item to DynamoDB using the DynamoDB table resources put_item() operation.
    table.put_item(
        Item=item
    )
Finally, if this succeeds, we return a successful status code and return the item we uploaded back to whatever made the HTTP request.
    return {
        'statusCode': 200,
        'headers': {'Access-Control-Allow-Origin': '*'},
        'body': json.dumps(item)
    }
Next, let’s look at the get() function which gets data back out of the DynamoDB table when we want to fetch it for an authenticated user. First, we get the same sub value out of the event:
def get(event, context):
    print(event)
    user_sub = event['requestContext']['authorizer']['claims']['sub']
Then we setup a DynamoDB get_item() request using the same structure for the pk and sk that we used when creating the user’s profile:
    pk = 'USERS#ALL'
    sk = 'USER#' + user_sub
    result = table.get_item(
        Key={
            'pk': pk,
            'sk': sk
        }
    )
Next, we get the item details back from the result of the get_item() operation and we return them back out to the caller of the HTTP API:
    print(result)
    item_info = result['Item']
    response = {
        'statusCode': 200,
        'headers': {'Access-Control-Allow-Origin': '*'},
        'body': json.dumps(item_info)
    }
    return response
And that’s it! This is everything for our service. Let’s deploy and test it out!
Deploying and Testing Our Service
To deploy our service, we can run serverless deploy. This should create our DynamoDB table, the Cognito User Pool and other Cognito resources, setup the HTTP API to use the Cognito User Pool, and configure our Lambda functions to power our API endpoints.
It should output something like this:
Service Information
service: http-api
stage: dev
region: us-east-1
stack: http-api-dev
resources: 22
api keys:
  None
endpoints:
  GET - https://0m4my0kq16.execute-api.us-east-1.amazonaws.com/user/profile
  POST - https://0m4my0kq16.execute-api.us-east-1.amazonaws.com/user/profile
functions:
  getProfileInfo: http-api-dev-getProfileInfo
  createProfileInfo: http-api-dev-createProfileInfo
layers:
  None
Serverless: Run the "serverless" command to setup monitoring, troubleshooting and testing.
After it does, you can test the endpoints out! But first, we’ll need to get our own JSON Web Tokens to do this!
Getting Our JWTs
First, you’ll need to log into AWS and go to the Amazon Cognito service and find the Cognito User Pool you created. From there, you’ll go to the App client settings and scroll down to the Hosted UI section. There, you’ll click “Launch hosted UI”.
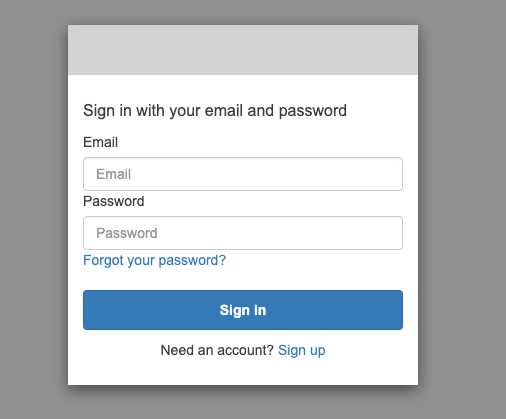
You’ll then click “Sign Up” on that page to create a new account in your Cognito User Pool. After you create and verify the account you can “sign in”. This wont actually log you in to anything, and will redirect you to a localhost page:
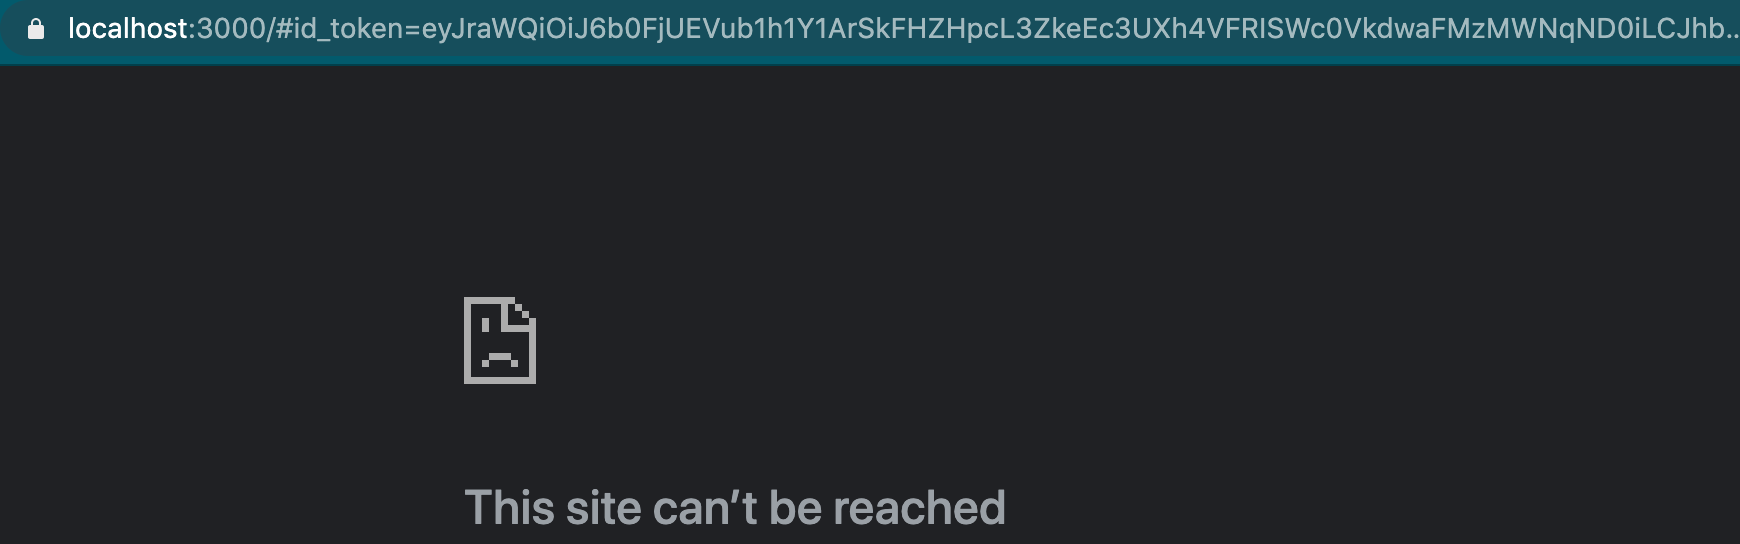
Have no fear! This is actually what we want. You’ll need to copy the contents of the URL bar into a text editor and extract the value that appears between id_token= and the &access_token. This is your id_token that you can use to authenticate a request to your API!
Once you have that value you can use a tool like Postman in order to test the request out:
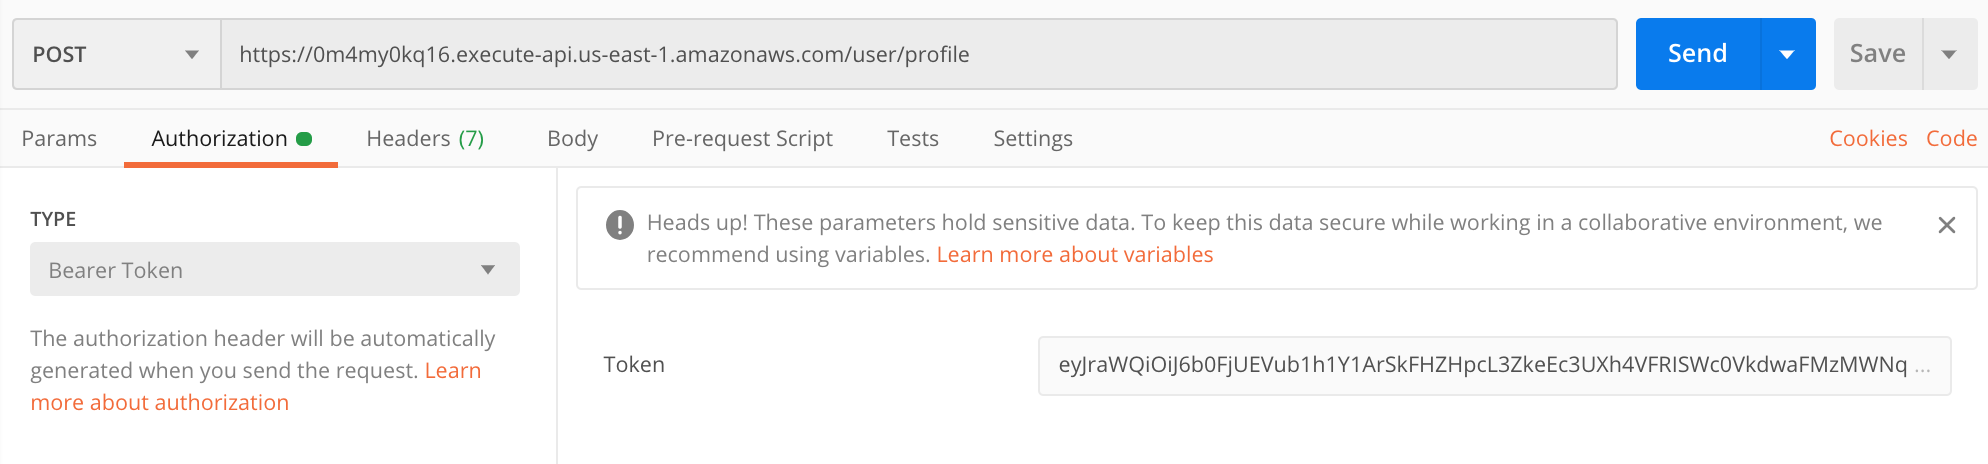
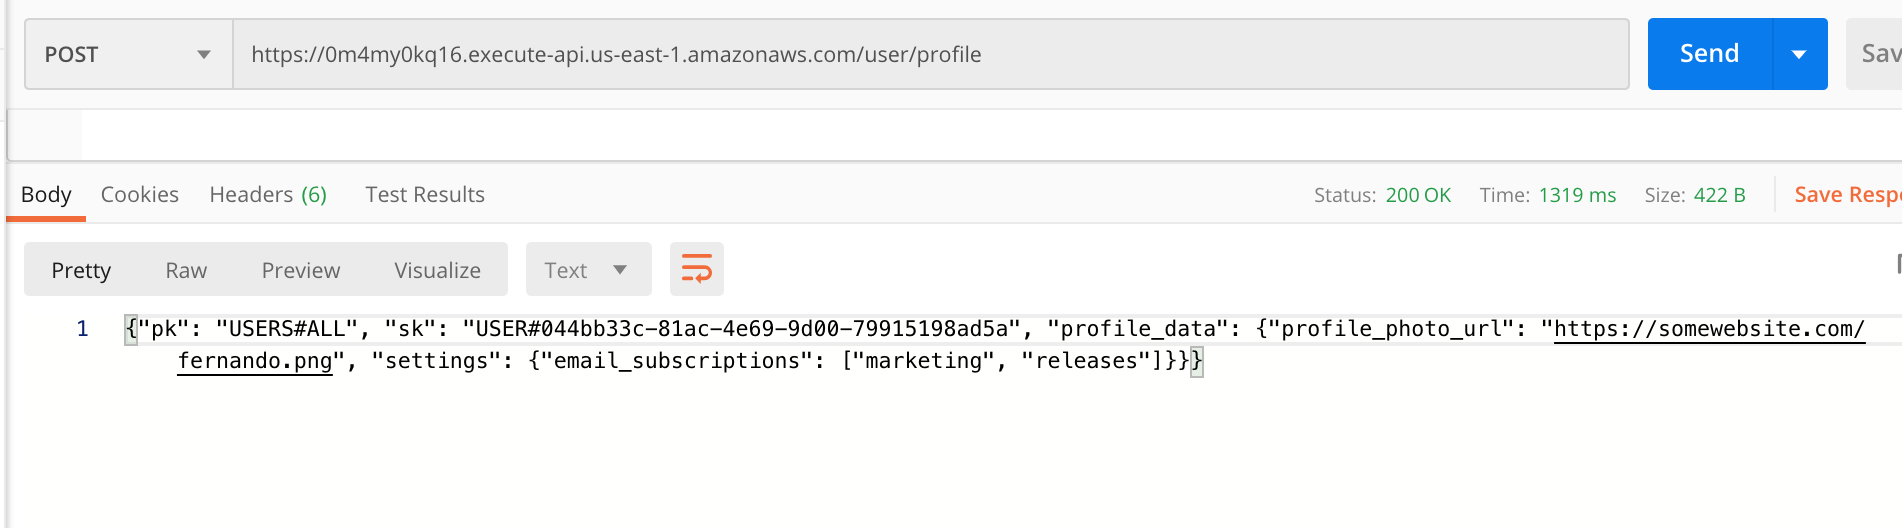
In the request above, I copied the API Endpoint value for the POST endpoint for the user profile into Postman and configured the Authorization section with a Bearer Token and pasted in my id_token value from above.
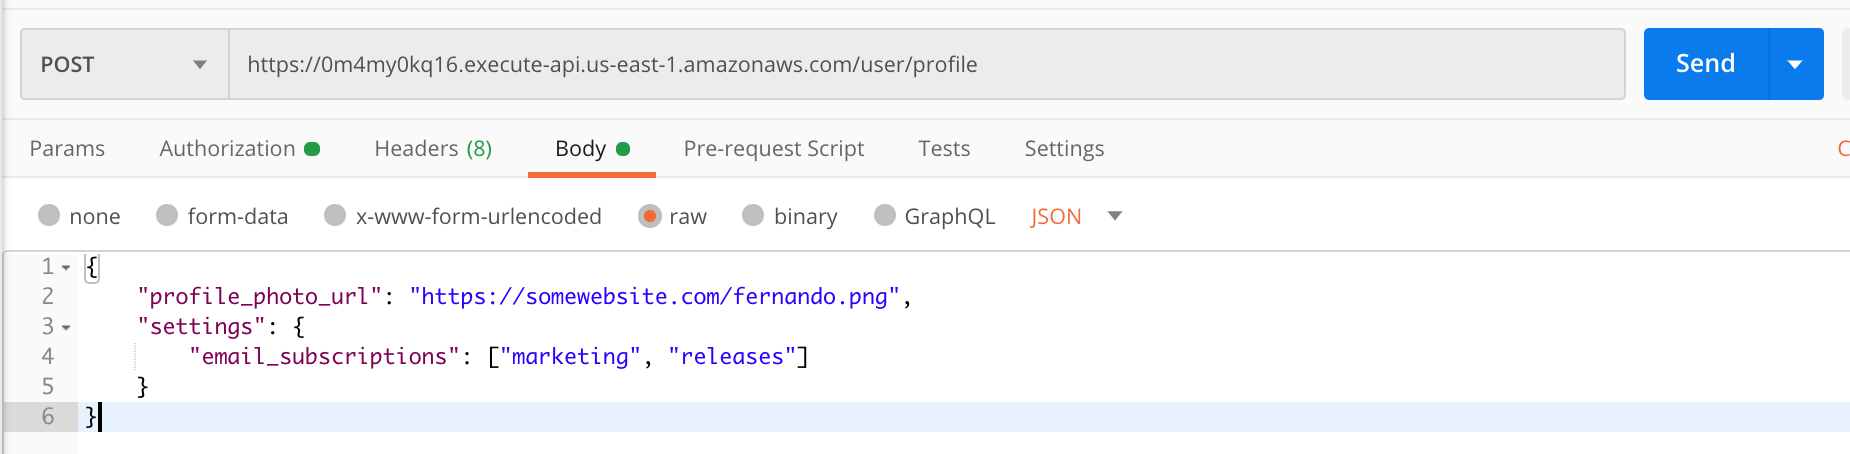
Next, we can create a JSON object the body of the Postman request and then send the request!
We’ll get back a response with the data we just saved in DynamoDB:
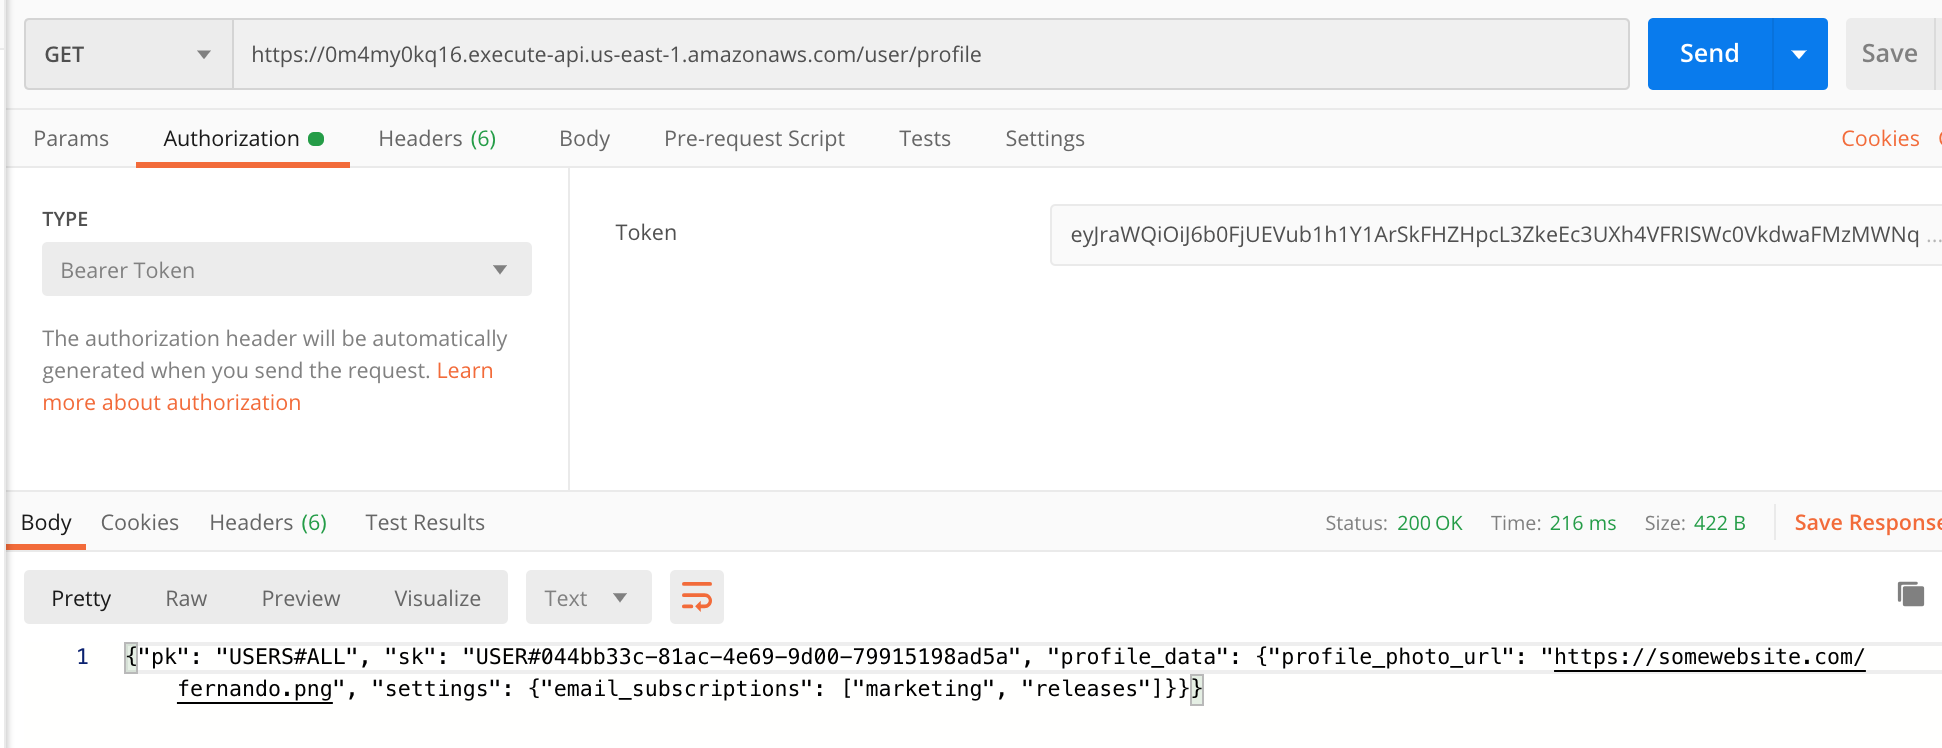
Now that our profile is created, we can get it at any time with a GET request as long as we’re using the same Bearer Token in the Authorization section:
And that’s it! We’ve created a user profile service that can store profile data on all our Amazon Cognito User Pool users! If you found this example helpful, consider looking at some of my other posts in my 20 Projects in 20 Days series or if you want to to get more familiar with DynamoDB take a look at one of my posts on how to get started with it using either Node.js or Python.